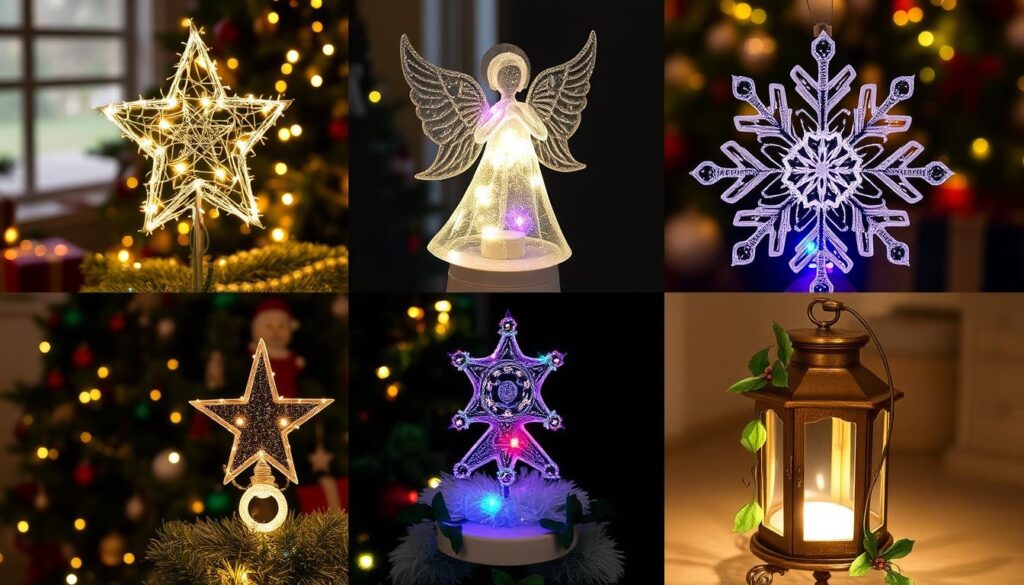
The holiday season is here, and decorating the Christmas tree is a beloved tradition. Making your own tree topper can add a special touch and spark your creativity. You can use natural materials for a rustic look or go for elegant paper and origami designs.
Choosing to make your holiday decorations by hand lets you show off your style and create memories with your family. It doesn’t matter if you’re a pro or just starting out. The fun of making your own tree topper is rewarding.
In this article, we’ll dive into different DIY Christmas tree topper ideas. You’ll find everything from rustic to elegant designs. We’ll also give you step-by-step instructions to help you create the perfect tree topper. Get ready to make your Christmas tree stand out with your own unique touch.
Traditional vs DIY Christmas Tree Toppers: Why Go Handmade
The topper of your Christmas tree is the star that makes your holiday display shine. Store-bought toppers are easy, but making your own homemade decorations is more rewarding and saves money. DIY toppers let you add a personal touch and start family traditions that make your tree special.
Benefits of Creating Your Own Topper
Making your own Christmas tree topper lets you show off your creativity. You can choose from fun designs to classic looks. These budget-friendly Christmas decor projects become keepsakes that remind you of happy times.
Cost Comparison: Store-bought vs Handmade
- Store-bought toppers can cost between $20 and $100 or more, based on the materials and design.
- Using simple materials like cardboard, fabric, or natural elements, you can make a topper for just $5 to $20. This makes it a more affordable choice.
Personal Touch and Family Traditions
Handmade custom tree toppers let you add your personal style and stories to your holiday decor. You can make a topper inspired by a family heirloom or work with your kids on a fun design. These crafted pieces become special traditions that warm your Christmas celebrations.
Choosing DIY for your Christmas tree toppers is a great way to make your holiday display unique. It lets you create lasting family traditions and enjoy the pride of making your own budget-friendly Christmas decor. By putting time and effort into these projects, you can make your holiday decor truly yours.
Essential Materials and Tools for Crafting Tree Toppers
Making your own Christmas tree topper is fun and creative. You can choose from rustic, elegant, or whimsical designs. Having the right materials and tools is key to making your vision come true.
Versatile Supplies for Tree Topper Construction
- Variety of craft wire (floral, copper, aluminum) for shaping and securing elements
- Fabric scraps (burlap, velvet, satin) for textural accents
- Assortment of paper (cardstock, origami, tissue) for intricate designs
- Adhesives (hot glue gun, craft glue, double-sided tape) for bonding materials
- Scissors, pliers, and wire cutters for cutting and manipulating supplies
Safety Essentials
- Protective gloves to avoid cuts and scratches
- Goggles to safeguard your eyes during crafting
- Well-ventilated work area when using adhesives or other fumes
With these craft supplies, DIY materials, and essential tools for tree topper construction, you’re ready to create a unique holiday centerpiece. It will show off your personal style and make your Christmas tree special.
“The best DIY projects are the ones that allow you to express your creativity and leave a personal touch.”
Rustic Star Toppers Using Natural Materials
Make your Christmas tree stand out with rustic star toppers made from natural materials. These ornaments bring a cozy, farmhouse vibe to your holiday decor. They mix rustic charm with the timeless beauty of nature.
Wooden Star Design Ideas
Wooden stars are a timeless choice for tree toppers. Choose unfinished wood or lightly stained pieces to keep the natural look. You can arrange stars in different sizes and patterns or try geometric designs for a modern twist.
Incorporating Twine and Burlap
Twine and burlap are key for natural tree toppers. Wrap twine around wooden stars for a handmade feel, or use burlap for soft, organic bows. These materials add depth and interest to your rustic decor.
Natural Element Embellishments
Add pinecones, dried flowers, or greenery to your rustic stars for extra charm. These elements bring a natural scent and enhance the woodland look. Choose and arrange them carefully for a beautiful display.
This holiday season, bring nature into your decor with rustic star toppers. Mix wooden designs, twine, burlap, and natural elements for a unique tree centerpiece. It will capture the warmth and coziness of the season.
Elegant Paper and Origami Tree Toppers
Make your Christmas tree stand out with beautiful paper crafts and origami decorations. Making your own tree toppers lets you show off your creativity and add a special touch. You can choose from simple origami stars to fancy paper flowers, making your tree sparkle.
Origami Masterpieces
Origami, an ancient Japanese art, is perfect for creating stunning tree toppers. Try making stars, snowflakes, and angels to add elegance to your tree. Pay close attention to detail to get a clean, polished look that matches your tree’s natural beauty.
Intricate Paper Crafts
If you like more detailed work, try paper crafting. Use techniques like kirigami and paper quilling to make delicate toppers that look like lace or flowers. These crafts take more time but are worth it for the amazing look they give your tree.
Durability and Longevity
When making paper and origami toppers, think about how long they’ll last. Choose strong, acid-free papers that can handle the holiday rush. Add supports like wire or cardboard to keep your toppers looking great all season.
| Paper Crafts | Origami |
|---|---|
| Intricate designs | Classic shapes |
| Delicate floral arrangements | Snowflakes and angels |
| Requires precision and patience | Focuses on precise folding techniques |
This holiday season, let your creativity shine with paper crafts and origami. Making your own tree toppers is a great way to make your tree unique and special. Show off your skills and make your Christmas tree a beautiful sight with these elegant toppers.

DIY Christmas Tree Toppers: Step-by-Step Projects
Making your own Christmas tree topper is a fun way to make your holiday decor special. It doesn’t matter if you’re new to DIY or have experience. There are many easy projects to help you make unique toppers for your Christmas crafting fun.
Basic Construction Techniques
Learning the basics is key to making a great DIY tree topper. You’ll need to shape wire frames and arrange natural elements carefully. The easy DIY projects below will show you how to do it step by step:
- Bend and shape wire forms to create the desired topper silhouette.
- Wrap the wire frame with fabric, ribbons, or other textural materials.
- Secure embellishments, such as pinecones, dried flowers, or ornaments, to the topper using hot glue or wire.
- Experiment with layering different materials and textures to add depth and visual interest.
Safety Tips and Guidelines
When working on your holiday decoration tutorials, safety comes first. Always remember to:
- Wear protective gloves to avoid cuts or scratches.
- Use sharp tools, such as scissors or wire cutters, with caution.
- Ensure that any electrical components, such as lights, are properly secured and do not pose a fire hazard.
- Keep small parts or choking hazards out of reach of young children.
Time-Saving Assembly Methods
If you’re short on time, there are ways to make your DIY tree topper quicker:
- Prepare materials in advance, cutting and shaping components before assembly.
- Utilize hot glue or other quick-drying adhesives to speed up the construction process.
- Opt for pre-made elements, such as wooden or metal forms, to reduce the time spent on fabrication.
- Enlist the help of family members or friends for a fun, collaborative experience.
With these tips, you’ll be able to make stunning DIY Christmas tree toppers. They will add joy and a personal touch to your holiday decor.
Lighting and Illuminated Topper Ideas
As the holidays get closer, adding light and sparkle to your Christmas tree can make it even more festive. DIY tree toppers with lights can turn a simple decoration into a stunning centerpiece. You can explore many options, from lighted tree toppers to LED Christmas decorations, to make illuminated holiday crafts that stand out.
Using battery-operated string lights or LED fairy lights is a great idea. These lights are easy to weave into your topper, giving it a warm glow. For a brighter look, plug-in string lights can provide steady light. Just remember to stay safe and avoid overloading electrical circuits.
- Incorporate battery-operated string lights or LED fairy lights for a subtle, twinkling effect
- Opt for plug-in string lights for a more intense, consistent illumination
- Always prioritize safety when using electrical components in your DIY projects
Try using translucent or iridescent materials like vellum, tissue paper, or shimmering organza. These materials can spread the light, making your tree glow softly. Play with different shapes, textures, and layers to get the lighting just right.
“The magic of Christmas is not in the presents, but in His presence.” – Unknown
The secret to a perfect lighted tree topper is to let your creativity flow. Whether you make something simple or something elaborate, the joy of making your own decoration is the best gift.

Kid-Friendly Christmas Tree Topper Crafts
As the holiday season comes near, families look for ways to get kids involved. Making DIY Christmas tree toppers is a great way to boost creativity and bond. It’s also a chance to learn new things while making something special for the tree.
Safe Materials for Children
Choosing the right materials for kids’ crafts is key. Look for things that are safe, soft, and easy to work with. Here are some good options:
- Felt or foam shapes
- Pom-poms and googly eyes
- Glue sticks or low-heat glue guns
- Blunt-tip scissors
- Colorful pipe cleaners or chenille stems
These materials let kids be creative without worrying about getting hurt.
Fun Family Project Ideas
Get everyone involved in making Christmas tree toppers. There are lots of fun projects that bring families closer. Here are a few ideas:
- Handprint or footprint tree toppers: Kids can press their hands or feet onto cardboard or foam. Then, decorate with paint, glitter, and more.
- Paper plate angels or snowflakes: Fold and cut paper plates to make angelic or snowflake tree toppers.
- Salt dough ornaments: Mix salt, flour, and water to make a dough. Kids can shape it and decorate it.
These projects make unique decorations and create lasting memories for the family.
Educational Crafting Opportunities
Christmas tree topper crafts are not just fun. They also offer learning chances. Here are some ways to make them educational:
- Counting and number recognition: Kids can count the pom-poms or other decorations they use.
- Color identification: Encourage kids to pick and mix different colors in their designs.
- Basic engineering concepts: Kids can learn about balance and stability by figuring out how to keep the topper steady on the tree.
By mixing learning with holiday fun, these projects help kids grow in many ways.
Conclusion
As you’ve looked through the DIY holiday inspiration and Christmas decorating ideas in this guide, we hope you’re excited to make your own festive home decor. Making a personalized tree topper is rewarding and can start a special family tradition.
Choosing a rustic star, an elegant origami design, or a whimsical lighting-enhanced creation is what matters. It’s the process of bringing your vision to life that’s important. Let your creativity shine and make your holiday celebrations unique.
Don’t be afraid to try new things, have fun, and let your inner artist show. Every year, you can try a new tree topper, adding something special to your holiday decor. Enjoy the process, make memories, and let your handmade creations be the highlight of your Christmas tree for years.